SP’s note: Please no off topic comments so that this post remains as useful as possible. Questions or clarifications about the topic are welcome, however. This post will be permanently available for reference on the Contributing Writers page.
The first time you get published on Glibs you will submit your manuscript via email and SP, or one of her editors, will do all the editing. If you continue submitting you will be granted access to the WordPress Dashboard; this is where you can paste in your text, upload your pictures, and fiddle with your article until it looks pretty enough to submit.
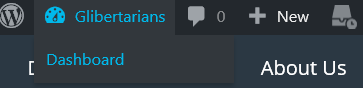
The Glibs website runs on WordPress which is a blog engine thingy. You’ll know you’ve been elevated when you are able to access the features of the WP Dashboard. Click on the word Glibertarians at the top of the window.
You will then see the WP Dashboard menu, shown below:
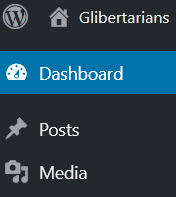
The two sections you will need to interact with in order to submit an article are Posts and Media. Let’s do Media first since that’s the simplest. Click on the word Media in the navigation bar on the left of the screen and you’ll be served the following page:
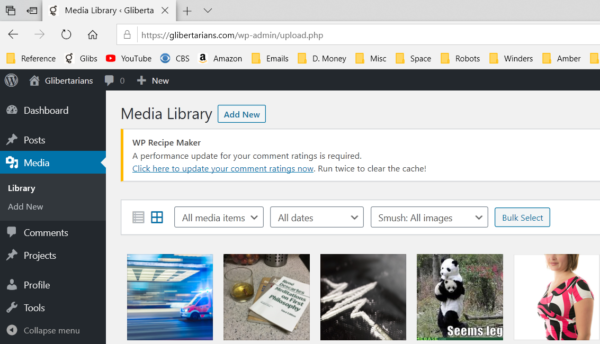
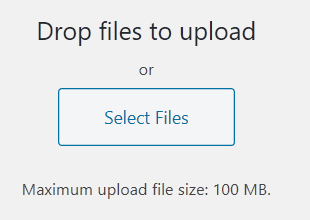
This is the Media Library where all the pictures, videos, gifs, sound clips, and videos live. To upload pictures for use in your post click on the Add New button and the upload box will appear. You can either drag and drop your files into the box, or use the Select Files button to open your computer’s file manager to select files.
It may take a few minutes to upload and smush your files depending on network traffic and server load. Once your photos appear as thumbnail images in the Media Library, you can click over to Posts, and and click Add New to create your draft post.
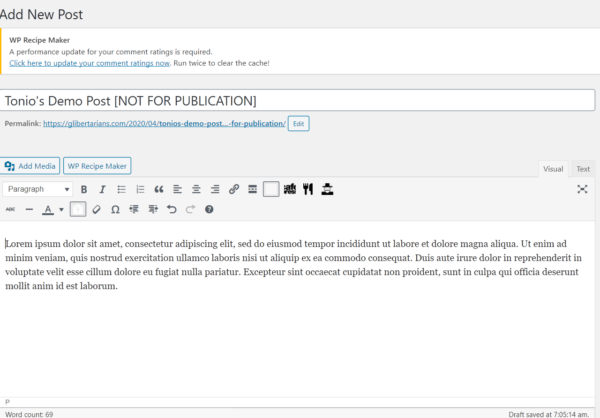
Begin by adding a title in the Title box. In the example below the working title is “Tonio’s Demo Post;” the text in square brackets is a clue to SP as to the status of the post, and will be stripped out before publication. The most commonly-used tags are “DRAFT” and “READY FOR SUBMISSION.”
Now you’re ready to paste in the text of your post. Open your word processor or text editor, select the text you want to paste into your post, and copy/paste the text from there to the body text box in the Glibs window.
Text that is fairly simple will come across well. The following features import reliably: vertical white space (blank lines between paragraphs), bolding, and italics. Embedded links will come across as clickable. Naked HTML will come across ugly – https://www.glibertarians.com
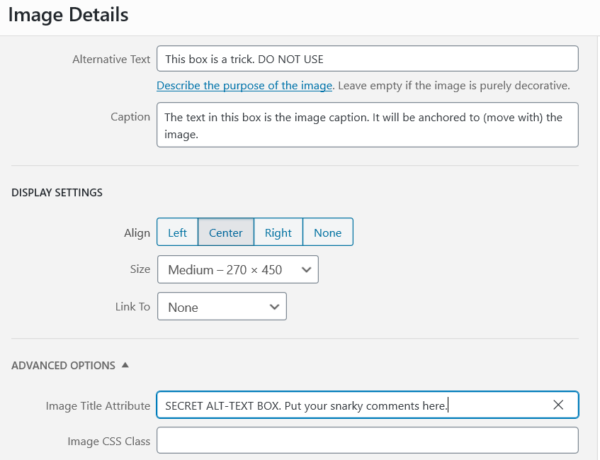
Photographs included as part of a pasted-in block of text will be ignored. Place photos into your article by clicking on the Add Media button. The Media Library will open. Click on the thumbnail image of the media you want to insert into your post, then click Insert into Post and your media will appear in your post. Once your photo appears in your post you can click on the photo to access the editing controls. The pencil control is the most useful, it opens the the Image Details menu from which all the image settings can be accessed.

Here you can add captions, alt-text, and change the size and alignment of the picture. Center alignment is the best option to use for the first article you edit yourself. Center-aligned photos do not have text to either side of them, unlike left-aligned and right-aligned photos which try to flow the text around the photo on the side opposite the photo’s alignment which can lead to some ugly outcomes with the text crowding the photo. Don’t forget to click the Update button in the lower-right when done.
While it is possible to drag the photo around the document, that can lead to interesting results. The best way to place a photo is to have three blank lines between the paragraphs where you want to place the photo. Put the cursor at the beginning of the second blank line and then click Add Media.
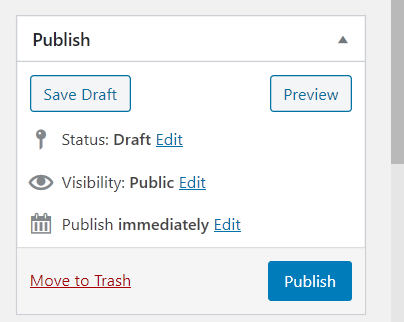
As you work on your draft you should periodically save it using the Save Draft button in the Publish controls in the sidebar to the right of the window. Do NOT click the Publish button (if you have one); SP does all the scheduling.
Once your article is nearing readiness for publication you should start filling in all the extras. Doing that yourself is a really good way to suck up to the editorial staff. Start with the Excerpt box. The text you put here is the teaser blurb that appears on the Glibs main page, underneath the title, author, and featured image.

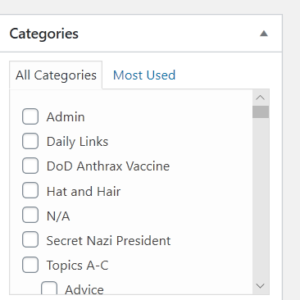
Categories is where you characterize your article. We have a wide variety of categories from the generic “fiction” to the specific “Harambe.” It’s okay if your article only fits into one or two categories. You can also un-check “I am Lame” which SP makes Glibpress check by default.
The seemingly innocent Extra Settings are quite important. Check to make sure that Sidebar Location is set to “no sidebar” or there will be an ugly sidebar in your post and you’ll get ragged.
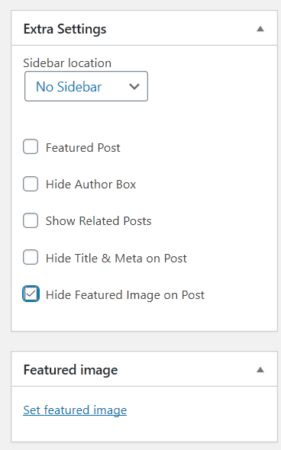
Also be sure to check hide featured image on post. The Featured Image is the photo that appears on the Glibs main page along with the article title and author information, and you select that with the Set Featured Image control. The Glibs website automatically crops your Featured Image to the biggest 16:9 rectangle in the center of the image. If we used our crustaceous maiden as our Featured Image, WordPress would auto-crop the image to the version shown below.

As you progress in editing your article you can use the Preview button in Publish Controls to view your post as it will appear when published. This is the stage at which you should have your content stable and start to worry about looks. Never be afraid to add whitespace; it gives your article a classy look. Keep the same amount of whitespace between paragraphs and illustrations throughout your article, whatever you decide that optimum amount is. When previewing your article be particularly watchful for unexpected font changes; these occur when WordPress mucks with your text, as WordPress will most treacherously do particularly when you move text around. You can highlight the problem section of text and use the Clear Formatting control, but this clears everything including bolding and italics.
![]()
If you’re brave, and have any experience with HTML, you can try to troubleshoot the HTML code manually. Click on the Text tab in the edit controls, circled in blue in the upper right of the illustration below. The text highlighted in yellow is a span tag with which WordPress will often embellish text that you move around within your article. Glibs editors affectionately call this the tag of doom; just delete the entire span tag, the angle brackets (aka “greater-than” and “less-than” symbols) and everything within them. HTML tags always travel in pairs so don’t forget to delete the “</span>” tag which is at the end of the block of violated text.

WordPress does a good job with bulleted and numbered lists, pull quotes, and text justification and indentation. If you need to insert a super-complicated table the simplest way is to print the table as a picture (.jpg, .png) and use the picture rather than try to do that in HTML. Remember that with images you should always use the highest resolution copy you have and then downsize as needed; never upsize an image if you can help it.
You finally reach that moment when your article is done, or at least you are done with it. Resist the temptation to submit it immediately. Put it aside for at least twenty-four hours. Then read the thing with a fresh eye – try to envision yourself reading someone else’s work. Glibs editors will, upon request, do a basic read-through and fixup of things like spelling, basic punctuation, and formatting (line breaks, whitespace). Then when it’s finally ready take that “[DRAFT]” tag out of the title and replace it with a “[SUBMISSION]” tag. Under the Publish controls, go to Status, click Edit and select Pending Review, then click OK.
Don’t forget to click to Update your post!
Write to SP if you have any special requests for timing; we know that people like to curate their articles and want to publish you at a time when you’re up and perky.
Excellent article, well written and clear. Thank you!
I like the lady kissing the lobstah!
ALT-TEXT: Everyone loves alt-text. WordPress is evil and tricksy. I mean you’d think that a text box labelled “alternative text” (in Image Details illo, above) would be where you put your alt-text, but noooo. Alt-text goes in the box labelled “image title attribute.”
I know I included this info in one of the illos, but wanted to add it here so it can be found via text search of this page.